Monday, December 5, 2011

Eng 271 HW (Post #10) Reflection Essay

I enjoyed my experience in English 271 this quarter. I felt that by writing so many kinds of essays and articles, I was able to experience writing in many different styles; an experience I've never had in any other English class. On top of that, this class didn't follow the norm of that is seen in most English classes, as it focused more on online writing instead of the traditional “typing and printing out” method.
By practicing online writing, in this case blogging, I feel more prepared to write in the future, be it for online purposes, or just in general.

The first entry, the Wikipedia article, was a little difficult to write. Given that my subject didn't already have a wiki page, I had to gather as much information on my own as possible. Also, I had to make sure not to include any bias in it, or even show that I liked the subject, which also made writing difficult.
There wasn't too much information available on my subject in just one location, so it was rather time consuming to just research it, let alone write about. I also had to filter through the information and determine what information was important to my audience, and what was not.

I also had some technical difficulties at the beginning of the class. I found it difficult to post comments, as some students had not yet allowed other users to post comments. Also, getting all of my classmates linked took awhile since there were some typos and some of my classmates made their blogs later than the majority of the class. It took awhile to get used to posting my work up on a blog, instead of printing it and turning it in as I had in other classes, but eventually I got the hang of it.

The post I enjoyed writing the most was the “Integrating Voice” assignment. I liked writing this one because I was allowed to show more of my own opinion and even possibly some (not so) hidden bias on something that I enjoyed, thus making the writing experience far more enjoyable than writing a standard essay. This was also a relatively new experience for me, as I've never truly gotten to incorporate my voice or opinion in a writing class before. Using this style of writing, I was able to put a voice into my work, making it more relatable to readers and thus, more fun to read.

One of the harder essays to write was the Extended Definition essay. Defining art was difficult, since it is a rather broad subject. Given that art is so difficult to completely define, I probably should have narrowed down my topic and had chosen a type of art to define instead, like classical art or abstract art. Because I did not, I had a wide range to cover, since art in general can be defined or interpreted in many different ways, all of which I probably couldn't even come close to covering in a 750 word essay.
This is also the only essay I would have liked to have spent more time on, and even have had a peer review for it. As mentioned before, I had the most trouble with this one, and it would have helped had we spent more time with it and even had a peer review workshop. Instead, I took advantage of the extra class day to get a little feedback on it, but more would have helped.

Another entry I had some difficulty with was the Classification Essay. I found this one difficult because, like my extended definition essay, my topic was a little too broad and quite difficult to categorize. It somewhat depended on opinion, since there were no “official” categories for my topic, which was the types of cartoons. Since this essay depended on opinion and the audience's experience with cartoons, I had to really rely on the feedback I received in my peer revising group. They truly helped me categorize my topic and helped me be more clear in my writing. They also gave me ideas of some good examples I could use to back up my reasons for the categories I made to organize the cartoons.

The class itself was overall enjoyable. I felt I truly learned everything listed in the course outcomes, and more. I felt that I really grew with this class. Though I may have had some difficulties when I first started, I managed to make it through to the end, and am grateful that I was able to partake in this class.

Wednesday, November 23, 2011

Eng 271 HW (Post #9) Classification Essay Revision


Cartoon Animations


Pretty much everyone nowadays has seen a cartoon at least once in their life. The term cartoon now refers to an animation, or an animated cartoon. Even though the original meaning of cartoon is simply, “a form of two-dimensional illustrated visual art," meaning drawings, most of which were for satirical purposes, people now use it to refer to animations.
Many people have grown up with cartoons, such as classic Disney movies, or cartoons that were, and still are played on the weekends, or after school hours for kids.
When most people think of cartoons, they think of simply animated drawings, when in fact, there are many different types, three being the “original” style of cartoons, the more modern “semi-realistic” cartoons, and the foreign “anime” cartoons.
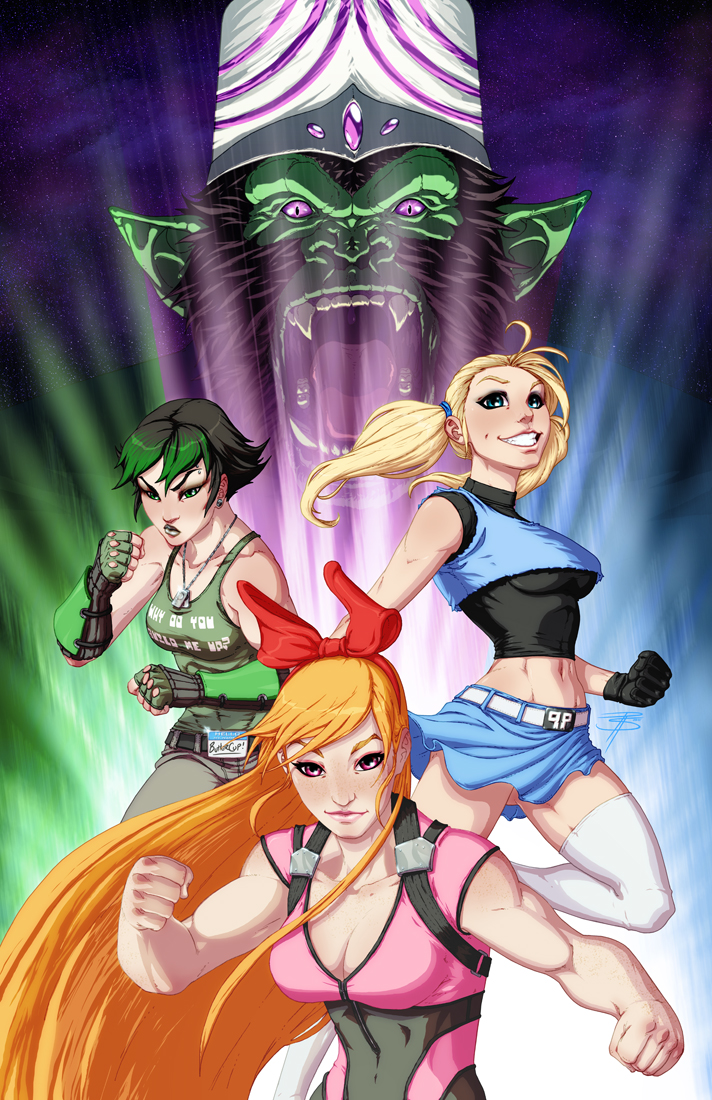
Powerpuff Girls "original" style

“Original” styled cartoons are the ones that most are familiar with, and the first to come to mind when cartoons are mentioned. This style is generally very simple, and includes strangely deformed animals, plants, or people. Some examples of this are the well known Disney characters Mickey Mouse, Donald duck, and so on, none of which actually look like the animal they supposedly are.
This style was the first to come about when cartoon animations were first created. An example is “Pauvre Pierrot,” which was one of the first animated cartoons ever created. It made its first public appearance on October 28th, 1892, to an audience in Paris. A more well known animation, “Steamboat Willie” by Walt Disney, was created in 1928, the beginning of the golden age for cartoon animations.
These early cartoon animations were the base for the various different styles of animations that are seen today. As the name of this category suggests, this style was, in a sense, the original style, and the other types are simply variations of it.


PPG Semi-realistic
Another group is the “semi-realistic” cartoons. As the name suggests, these cartoons look more realistic than earlier cartoons, which involved the characters’ bone structure, among others things, to morph or change spontaneously. The “semi-realistic” style of cartoon is most often, but not always, used for super hero cartoons and the characters look more like real people than the deformed “original” cartoons. The characters in this style do not have enlarged heads, and, while “original” cartoon characters had only four fingers at most, characters drawn in this style always had five. The reason this style was used for super hero shows was because most of them were based off of comics, and the comics were generally drawn in that “semi-realistic” style.  Some examples of this style are the cartoon series “X-men”, “Batman”, and many other super hero comic-based cartoons.  Though this style may have included busty, thin-waisted women, and incredibly muscular men, this style was still far more accurate than earlier cartoon animations as far as actual proportion went. Other examples of this style would be the shows “Archer” and “King of the Hill.”


PPG in Anime style
Another group that has become popular around the world is “anime” styled cartoons. Anime most commonly refers to Japanese cartoons, as the anime style originated in Japan, and is somewhat of a mix between “realistic” and “original” cartoons, where the characters aren’t completely deformed, but not completely realistic. The style itself may vary between being somewhat “realistic” and somewhat “original”, but it is distinctly different from western cartoons. The one part that most find notable about this style is the disproportion of the eyes and the odd hair color or style most anime cartoon characters seem to have, given that this is normally the only part that is noticeably out of proportion or unrealistic.
While the first Japanese animation was created in 1917, the style of anime hadn’t begun developing until the 1960s. The style itself wasn’t known outside of Japan until the 1980s. Like “realistic” cartoons, a lot of, but not all, anime is based off of a comic, or manga, as it is otherwise called. Some are even based off of games, like the popular anime series Pokémon.


When people hear the word “cartoon” they think of the wacky “original” cartoon animation. But, as it has been shown, there are many different styles of cartoons.
 Cartoons are now a diverse and well-known source of entertainment.  While “original” cartoons are the first style of animated cartoons, there are now many new types, “semi-realistic” and “anime” cartoons being just two other variations.

Monday, November 21, 2011

Eng 271 HW (Post #8) Classification Essay

Cartoons

Pretty much everyone nowadays has seen a cartoon at least once in their life. The term cartoon now refers to an animation, or an animated cartoon. Even though the original meaning of cartoon is simply, “a form of two-dimensional illustrated visual art," meaning drawings, most of which were for satirical purposes, people now use it to refer to animations.
Many people have grown up with cartoons, such as classic Disney movies, or cartoons that were, and still are played on the weekends, or after school hours for kids.
When most people think of cartoons, they think of just “cartoony” cartoons, when in fact, there are many different types, two others being “realistic” and “anime” cartoons.


PowerPuff Girls
“Cartoony” styled cartoons are the ones that most are familiar with, and the first to come to mind when cartoons are mentioned. This style is generally very simple, and includes strangely deformed animals, plants, or people. Some examples of this are the well known Disney characters Mickey Mouse, Donald duck, and so on, none of which actually look like the animal they supposedly are.
This style was the first to come about when cartoon animations were first created. An example is “Pauvre Pierrot,” which was one of the first animated cartoons ever created. It made its first public appearance on October 28th, 1892, to an audience in Paris. A more well known animation, “Steamboat Willie” by Walt Disney, was created in 1928, the beginning of the golden age for cartoon animations.
These early cartoon animations were the base for the various different styles of animations that are seen today. In a sense, this style was the original style, and the other types are simply variations of it.


Another group is the more “realistic” cartoons. This style of cartoon is most often used for super hero cartoons and the characters look more like real people than the deformed “cartoony” cartoons.
The reason for this style is because most super hero shows were based off of a comic, and the comics were generally drawn in that “realistic” style.  Some examples of this style are the cartoon series “X-men”, “Batman”, and many other super hero comic-based cartoons.  Though this style may have included busty, thin-waisted women, and incredibly muscular men, this style was still far more accurate than earlier cartoon animations as far as actual proportion went.


PPG in Anime style
Another group that has become popular around the world is “anime” style cartoons. Anime most commonly refers to Japanese cartoons, as the anime style originated in Japan, and is somewhat of a mix between “realistic” and “cartoony” cartoons, where the characters aren’t completely deformed, but not completely realistic. The style itself may vary between being somewhat “realistic” and somewhat “cartoony”, but it is distinctly different from western cartoons. The one part that most find notable about this style is the disproportion of the eyes most anime cartoon characters seem to have, given that this is normally the only part that is noticeably out of proportion.
While the first Japanese animation was created in 1917, the style of anime hadn’t begun developing until the 1960s. The style itself wasn’t known outside of Japan until the 1980s. Like “realistic” cartoons, a lot of, but not all, anime is based off of a comic, or manga, as it is otherwise called. Some are even based off of games, like the popular anime series Pokémon.


When people hear the word “cartoon” they think of the wacky “cartoony” cartoon animation. But, as it has been shown, there are many different styles of cartoons.
 Cartoons are now a diverse and well-known source of entertainment.  While “cartoony” cartoons are the original style of animated cartoons, there are now many new styles and types, “realistic” and “anime” cartoons being just two other variations.

Wednesday, November 16, 2011

Eng 271 HW (Post #7) Rhetorical Mode: Process Analysis Essay Revision


How to make cookies: (Chocolate chip cookies, to be exact.)

Ever wondered how to make chocolate chip cookies? Of course you have! Otherwise you wouldn’t be reading this. In just four steps, you’ll be able to make your very own batch of chocolate chip cookies. 

Step One: Prep time!
Buy/make sure you have all the necessary ingredients for cookie making, as well as a mixer, a couple cookie sheets, a cup measurer and an oven as well as oven mitts. If you don’t have these things already, it will incredibly difficult to accomplish this task of cookie making and baking. If you don’t have a mixer you will have to stir by hand, and if you do not own a microwave you will need to let your butter sit out and soften before mixing your ingredients. Also, if you don’t know how to work an oven, or baking is difficult for you, you may not want to attempt something as dangerous and complex as cookie making.

As far as ingredients go, you’ll need flour (2 ¾ cups, roughly), sugar and brown sugar (2/3 cup of each), butter (1 cup), 2 eggs, ½ a teaspoon of salt, and a teaspoon of both vanilla and baking soda. Don’t forget to also buy a bag of chocolate chips. You get to decide how much chocolate you want your chocolate chip cookies to have. I like to pour in a whole bag, but that’s just because I love chocolate.
Set up your mixer and get all the ingredients, cookie sheets, and measuring utensils out. Make sure you actually have room to put them somewhere. That should be simple enough.
If you’ve made cookies before and are quick to mix all the ingredients together and get them on a cookie sheet, you can start preheating the oven to 350F. If you’re slow, even if you’ve done it a million times, like me, then you should wait until all the ingredients are mixed together.

Step Two: Begin mixing with the small stuff
Start mixing together the ingredients.
First, you start with the small stuff. Mix the vanilla, salt, and baking soda first. Remember, only half a teaspoon of salt, a teaspoon of vanilla, and a teaspoon of baking soda. If you don’t want to be wasteful, then you can use the same teaspoon to measure out all the necessary amounts of the three ingredients.

Next go in butter and eggs.

If your butter isn’t already soft, make sure to microwave it for 10-15 seconds. Be sure not to leave your butter in the microwave forever though! It doesn’t need to be completely melted; just soft.
Now that your butter is nice and soft, stick it in the mixer and mix away. Next come your eggs.
Before you throw in your eggs, shell and all, make sure to follow these two simple guidelines. First, check the egg for any abnormalities. If it’s all cracked and 10 weeks old, it might not be good anymore. Second, if you don’t like eggshell in your cookies, and you’re worried about getting shell fragments into your cookies, then take out a small bowl, break open the egg, and dump the contents into the bowl. That way, you can more easily inspect the egg not only for eggshells, but also for if you missed something when checking the outside of the egg and it turned out to be nasty anyway. I use this method sometimes because it’s much easier to get eggshell fragments out of the yolk when it’s in a separate bowl than if I put the yolk directly into the mix first without checking.

After this, feel free to put the eggs in and let the mixer do its job. Make sure that when you are adding to the mixing bowl that the mixing bowl is off. This should be obvious, but there is probably some idiot out there that will probably stick their hand in the mixer or something.

Step Three: Add the Sugar, Flour, and Chocolate
Now it’s time to use your handy dandy measuring cup. Pour some sugar into it until it fills to the 2/3 cup mark, then dump it into the mixer. Do the same for the brown sugar. After that, make sure all the ingredients are properly mixed together. That means no giant chunks of butter are left in your delicious masterpiece in the making. If there are no chunks, and it all looks like it’s completely blended together, then you can add the flour. Remember, flour is messy, so be extra careful with it, and if you spill it everywhere, don’t use a wet rag to wipe it up. 

To add the flour, use your measuring cup to measure out around 2 ¾ cups of flour. Make sure you allow the mixer to stir in the flour until your dough is not longer white between each cup you put in. Depending on how you like your cookies, add more or less flour. More flour=more sturdy cookies, less flour=flat and flimsy cookies.

Now that you have flour in the mix, your contraption can now be called “dough.” In order to make chocolate chip cookies, you’ll need chocolate to add to your dough. If you bought a bag of chocolate chips (like you were told to in step 1) then feel free to add as much as you like, then mix it into the dough. Don’t mix the chocolate too long, because it’s bad for the chocolate.

Step Four: Playing with dough and Baking!
Get a spoon, or use your hands if you like getting messy, and start scooping out the dough and sticking it onto the cookie sheets. At this point, make sure your oven is on if it isn’t already. Depending on how you want your cookies to look, you can simply take round scoops and stick them on. If you’re going for a more messy and amateurish look, then simply pour your cookie dough all over the sheet. It’ll just be one giant cookie in the end. Well, it doesn’t matter as long as it tastes good, right?

Now for the moment you’ve been waiting for…Baking your cookies!

Carefully place your cookie sheet(s) in the oven, but remember to wear oven mitts when doing this, as the oven is very hot. Now set the oven’s timer to 8 minutes, and start preparing another cookie sheet if you still have dough.

After 8 minutes is up, check to see if your cookies are now a nice, brownish color. If they still look like piles of dough, than you should leave them in for a couple more minutes until they’re fully baked. Don’t leave them in too long though, unless you like burnt, rock hard cookies.

Once they’re done baking, put on your oven mitts of safety and pull them out. Be careful when handling hot trays! I once burned my hand rather badly because I didn’t make sure that my hand was fully covered before trying to get a tray out. 

After you have your cookies out, make sure to place them on an area that can stand withstand high temperatures. If you have cooling trays, you can place your cookies on those after they’ve sat out for a couple minutes. That way, they won’t stick to the cookie sheet.

Now that your cookies are all baked, make sure to turn the oven off, and enjoy your cookies.

Sunday, November 13, 2011

Eng 271 HW (Post #6) Rhetorical Mode: Process Analysis Essay

How to make cookies: (Chocolate chip cookies, to be exact.)


Step one: Prep time!
Buy/make sure you have all the necessary ingredients for cookie making, as well as a mixer, a couple cookie sheets, a cup measurer and an oven.
If you don’t have these things already, it will incredibly difficult to accomplish this task of cookie making and baking.
As far as ingredients go, you’ll need flour (2 ¾ cups, roughly), sugar and brown sugar (around 2/3 cup of each), butter (1 cup), 2 eggs, ½ a teaspoon of salt, and a teaspoon of both vanilla and baking soda. Don’t forget to also buy a bag of chocolate chips. You get to decide how much chocolate you want your chocolate chips to have. (I like to dump in a whole bag, but that’s just cause I love chocolate)

Step two:  Set up (aka Prep Time 2)
Set up your mixer and get all the ingredients, cookie sheets, and measuring utensils out. (Make sure you actually have room to put them somewhere. The floor doesn’t count.) That should be simple enough.
If you’ve made cookies before and are quick to mix all the ingredients together and get them on a cookie sheet, you can start preheating the oven to 350F. If you’re slow (even if you’ve done it a million times) like me, then you should wait until all the ingredients are mixed together. Let’s not waste electricity.

Step three: Begin your mixing with the small stuff (and animal products)
Start mixing together the ingredients.
First, you start with the small stuff. Mix the vanilla, salt, and baking soda first. (remember, only half a teaspoon of salt, a teaspoon of vanilla, and a teaspoon of baking soda. If you don’t want to be wasteful, then you can use the same teaspoon to measure out all the necessary amounts of the three ingredients.
Next go in your animal products. (that means the butter and eggs)
If your butter isn’t already soft, make sure to microwave it for 10-15 seconds. (if you don’t have a microwave, you should’ve let your butter sit out for awhile before attempting to make something as complicated as cookies.) Be sure not to leave your butter in the microwave forever though! It doesn’t need to be completely melted; just soft.
Now that your butter is nice and soft, dump in into the mixer and mix away. Next come your eggs.
Before you throw in your eggs, shell and all, like an ignorant child who has never cooked before, make sure to follow these two simple guidelines. First, check the egg for any abnormalities. If it’s all cracked and 10 weeks old, it might not be good anymore. Second, if you’re worried about getting shell fragments into your cookies, then take out a small bowl, and break open the egg and dump the contents into that. That way, you can more easily inspect the egg not only for eggshells, but also for if you missed something when checking the outside of the egg and it turned out to be nasty anyway.
After this, feel free to dump the eggs in and let the mixer do its job. Make sure that when you are adding to the mixing bowl that the mixing bowl is off. This should be obvious, but there is probably some idiot out there that will probably stick their hand in the mixer or something and I don’t want to get sued.

Step four: Add the sugar and flour
Now it’s time to use your handy dandy measuring cup. Pour some sugar into it until it fills to the 2/3 cup mark, then dump it into the mixer. Do the same for the brown sugar. After that, make sure all the ingredients are properly mixed together. That means no giant chunks of butter are left in your delicious masterpiece in the making. If there are no chunks, and it all looks like it’s completely blended together, then you can add the flour. Remember, flour is messy, so be extra careful with it, and if you spill it everywhere, don’t use a wet rag to wipe it up.
To add the flour, use your measuring cup to measure out around 2 ¾ cups of flour. Make sure you allow the mixer to mix in the flour between each cup of flour you dump in. Depending on how you like your cookies, add more or less flour. (more flour=more sturdy cookies, less flour=flat and flimsy cookies)

Step five: Put in the chocolate
Now that you have flour in the mix, your contraption can now be called “dough.” In order to make chocolate chip cookies, you’ll need chocolate to add to your dough. If you bought a bag of chocolate chips (like you were told to in step 1) then feel free to add as much as you like. (I usually just dump in the whole bag, then mix it into the dough) Don’t mix the chocolate too long, cause it’s bad for the chocolate.

 Step 6: Playing with dough
Get a spoon (or use your hands if you like getting messy), and start scooping out the dough and sticking it onto the cookie sheets. (at this point, make sure your oven is preheating to 350F if it isn’t already) Depending on how you want your cookies to look, you can simply take round scoops and stick them on. If you’re going for a more messy and amateurish look, then simply dump your cookie dough all over the sheet. It’ll just be one giant cookie in the end. (well, it doesn’t matter as long as it tastes good, right?)

Step 7: Baking!
Place the cookie sheet(s) in the oven (which should be at 350F by now). Remember to wear oven mitts when doing this, as the oven is very hot. Now set the oven’s timer to 8 minutes, and start preparing another cookie sheet (if you still have dough).
If this is difficult for you, or you don’t know how to work an oven, then maybe baking isn’t for you.
After 8 minutes is up, check to see if your cookies are now a nice brownish color. If they still look like piles of dough, than you should leave them in for a couple more minutes until they’re fully baked. Don’t leave them in too long though (unless you like burnt, rock cookies).
Once they’re done baking, put on your oven mitts of safety and pull them out. Make sure to place them on an area that can stand really hot cookie sheets. If you have cooling trays, you can place your cookies on those after they’ve sat out for a couple minutes. That way, they won’t stick to the cookie sheet.
Now that your cookies are all baked, make sure to turn the oven off like a person with common sense would, and enjoy your cookies.

Monday, November 7, 2011

Eng 271 HW (Post #5) Extended Definition Essay

Define "Art"

Nowadays, art is everywhere. It is seen on the television, heard on the radio, found on bookshelves, on the internet, and even on the streets. It is impossible to avoid it. Art isn't contained in a museum. It's a part of life. But when people hear “art,” most of the time they think of just visual art, even though any form of creative writing or music can also be considered “art”. Since people have many different ideas about what “art” is and what it can be, there truly is no concrete definition for art. Even without a concrete definition, everyone knows what art is, even if they have different categories or standards for it.
If one were to search the definition for art on google, you’d be given this definition:
  1. The expression or application of human creative skill and imagination, typically in a visual form such as painting or sculpture,...: "the art of the Renaissance"
  2. Works produced by such skill and imagination.
Though this is one definition, art can truly be anything. Some say that it is a window into a person’s mind/soul/heart. Art can, and is many times used to, convey a message. Art could also be defined as something that is created from someone’s emotions. Art comes in many forms. There are visual, audio, and written forms of artwork.

Visual art are images, like photographs, paintings, and drawings. This form of artwork is known by all as art, and it is what is commonly displayed in museums. Paintings, drawing, and photography are visual art, as most people would agree. Anything involving creativity can be considered an “art.” Even the doodles drawn by a child on a scrap of paper can be called “art” as it demonstrates creativity. Everyone has seen a visual art sometimes in their life, whether is was in one of the many art museums in the world, or even a picture in a magazine. Visual art tells a story or conveys an emotion using an image. There are many types of visual art, some examples being abstract paintings, black and white photography, and so on.


Another type of art is written art, which includes poetry and some writing. Since it comes in all different forms, and it still taps into human creativity, some can say that creative writing, and poetry are forms of artwork. Though some may say it isn’t art since it isn’t a visual piece, others may believe it is, as it can create images with words. Since writing and poetry can be used to convey emotions and creativity through the use of written words, it is very much an art, though some may disagree, because they believe that art can only be visual art. Writing can use imagery to help the reader create their own picture in their mind, instead of simply giving the audience an image, like visual art. It is said a picture is worth a thousand words, meaning it tells a story. On the flipside, in creative writing, the author tells the audience the story instead of giving them a picture. Though some writing can be considered art, not all writing is. For example, essays would not be considered writing, but a short story could. In poetry, not only does the author tell a story, but they also allow the reader to create their own interpretation of it, making the meaning of the poem different to each person. Even haikus are a form of poetry and considered an art.
Even music can be considered an art. And music, of course, is audio art. Hence, why modern musicians are called “artists.” Music is, in a way, quite similar to poetry (if the song has lyrics). Again, it would trying to convey emotions and ideas through the creativity of the lyrics in the song, though it would be vocally, allowing the artist to put emotions into the words that they wouldn’t be able to on paper. Even though music may share this similarity with poetry/writing, it still has many other parts to it, such as the music itself. Not all music has lyrics; some rely on the melody and notes of the song to convey emotions. In classical music, musicians had a great deal of choices at their disposal. Such as, which instruments to include in their piece, the role of the instruments, the notes themselves, the volume at all parts of the song, the list goes on.

Art can be virtually anything that is created from a person's imagination. It can take many forms, and its possibilities seem truly endless. Though there is no exact definition for what “art” is (or even what “writing”, “poetry”, “music”, and even “artist” are) everyone can identify it and has experienced at some point in their life. The idea of art has drastically changed and broadened since the Renaissance, as visual art has now become more about emotions and messages than the visual appeal, and what is considered “music” has completely changed altogether with the development of new technology and instruments. Only written art appears to have changed the least, as it still contains stories, emotions, and complex ideas. Perhaps, in time, even things we don’t consider art today may be seen as art by future generations.

Sunday, October 30, 2011

Eng 271 HW (Post #4) Revision of "Integrating Voice in Expository Writing"


N A N D A
Acrobaticalists
Just a short while ago, I went with my immediate family to see the group NANDA perform. I had little knowledge of the group, and didn’t know exactly what kind of show I was going to see, aside from my parents describing it as “ninja stuff.” I followed my family into the small, fairly crowded theater, and prepared myself for about an hour or so of serious acrobatic tricks and displays.
NANDA is an “acrobaticalist ninja” group, that performs acrobatic and “ninja” tricks. (Acrobaticalist in not a real word, but it’s been deemed an appropriate word to describe the group) This includes fake fighting, impressive jumps and flips, and juggling, all of which were included in their show.

From my previous experiences with these kinds of circus and acrobatic shows, I thought it was going to be a serious performance, as most (but not all) circus performances are fairly serious, where the performers just display their skills and “wow” the audience.

Then the opening video began playing.

It was like going to a movie, where the opening credits play and let you know who contributed to what. However, in this case, NANDA just used it as a way of saying they did everything (which they did).

After the short opening credits, the video continued with a narrator telling a story of a Jacket that was created before the sun by the ancient ones, which would grant the wearer the power of 10 suns. This nonsense continued for a couple minutes before the four members of NANDA finally made their appearance on stage…wearing fake hair and ridiculous looking beards (they were supposed to be the “ancient ones”). Then, they began to fight over the jacket, with small bits where they moved in “slow-mo.”

After they finished “fighting,” one of them hid the jacket in a silver briefcase (mind you, this is supposed to be taking place in a time before the sun…) while his actions were being narrated. A video then began playing, with the narrator telling of how the ancient jacket traveled through the centuries in the silver briefcase. (They included pictures showing the briefcase in famous pictures, such as a portrait of Napoleon, in which he was holding the briefcase.)

They then showed a short clip with subtitles telling the audience that the new setting will be in a Japanese subway in Tokyo in current time. (They tried spelling “present” multiple times, but eventually just went with “current” time. Then, “like, right now.”) One of the performers came on stage with the briefcase, and was soon followed by the other performers. Then they started fighting over the briefcase. Again. Only this time it was even more ridiculous because they had new technology on their side (and by technology, I mean Nerf guns).


This idea of fighting over a jacket continued through the whole performance, with small sections that involved juggling and invisible guns (and cardboard tanks, and dancing robots, and…the list goes on and on). They also included humorous videos between scenes, such as an ad for the “Time Taker-Upper 3000” for when you need more time to change costumes between scenes and you need something to distract the audience with.
That was only a small amount of the silliness that was contained in their show.

The group NANDA is made up of four men; Misha Fradin, Kiyota and Tomoki Sage, and Chen Pollina. According to the brochure, the roles they each play (in the same order that their names are listed above) are, Agency Man, Other Japanese Man and Japanese Man, and Adventure Man. Their brochure also includes a short (but probably not entirely accurate) background on each of them. For example, in the bio for Kiyota Sage, it says that he “underwent vigorous training for his role as the Japanese businessman from Kyoto…spending hours eating sushi and putting together small electronic components. Kiyota has a photogenic memory for stuff that has happened.” It also says that Chen Pollina “was raised primarily on rice cakes and quinoa,” and well as other ridiculous things. The bios of the other two NANDA members were also written in this ridiculous manner.

They also state in their brochure, under cast & crew, that the “writing, direction, production, music, video, choreography, promotion, slow-motion, facial emotion, [and] wild notions of locomotion” were provided by NANDA. This is just a small example of the humor they incorporated into their whole performance and production.

The name of their performance was called “The Jacket” (because it was about a jacket) that could grant the wearer an incredible and unique power. For example, when one of the members wore the jacket, they had the ability to slow down time, causing the other members to move slowly while they could move normally. When another member was wearing, they had the ability to read minds, even those of the audience. Throughout the performance they choreographed their fighting and movements that fit perfectly with the music and sound effects that were played.

On their website, they stated that, “this [was] the first major run of The Jacket in a larger metropolitan city.”

Overall, my family and I enjoyed the performance and were glad we decided to see them.

NANDA performed at the Broadway Performance Hall in Seattle, Washington from October 6 through the 23, Thursdays through Sundays at 8:00 PM.

For more information on this show (so you'll know where you can see them actually perform instead of reading blogs about their performance), go to their website at www.thejacketshow.com.